Embarking on the journey of mosaic art can be incredibly rewarding, transforming small pieces into stunning visual narratives. For many, the intricate beauty of ancient mosaics in Rome or Byzantium seems daunting, but creating your own mosaic masterpieces is more accessible than you might think. This guide focuses on simple beginner mosaic projects, providing aspiring artists with the knowledge and confidence to start their creative adventure. We will cover essential materials, basic tools, and easy step-by-step instructions to ensure your first projects are a resounding success.
Why Dive into Mosaic Art as a Beginner?

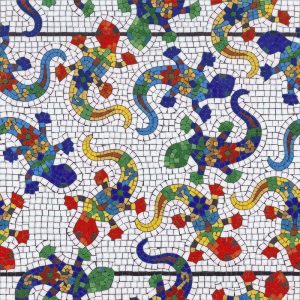
Mosaic art boasts a rich history spanning over 4000 years, with its origins in Ancient Mesopotamia. From the opulent villas of Roman emperors to the sacred halls of Byzantine churches like Hagia Sophia, mosaics have always been a powerful form of expression. Today, this ancient art form is experiencing a modern renaissance, blending traditional techniques with innovative approaches. For beginners, mosaic art offers a unique blend of creativity and tactile satisfaction.
Starting with beginner mosaic projects is an excellent way to explore your artistic side without requiring extensive prior experience. It is a meditative process that allows you to work with vibrant colors and diverse textures, creating something truly unique. The average cost for a basic starter kit, including tiles, adhesive, grout, and a substrate, can range from approximately $20 to $50 USD, making it an affordable hobby to pick up. Moreover, the growing popularity of DIY projects means there’s a wealth of online courses and workshops available to guide you. If you are curious about the overall cost and how to begin, consider exploring Mosaic as a Hobby: How to Start & What It Costs.
mosaics when you master the basics.”>
Essential Materials for Your First Beginner Mosaic Projects

Choosing the right materials is crucial for making your initial beginner mosaic projects enjoyable and successful. While there’s a vast array of materials available, some are more suitable for newcomers due to their ease of use and affordability.
- Glass Tiles: These are an excellent starting point. They are readily available, come in a wide range of colors, and are relatively easy to cut. Glass tiles are perfect for indoor projects like decorative frames or small wall hangings. They are also ideal for children’s projects, as highlighted in Mosaics for Kids: Safe Materials & First Projects.
- Smalti: While a more traditional and professional material, smalti (opaque glass specifically made for mosaics) offers unparalleled depth and durability. ArtWorker’s V3.2 palette offers 163 repeatable colors, and the unique MELTI collection boasts 24 experimental shades. You can learn more about this versatile material in Smalti for Mosaics: Types, Properties & How to Choose.
- Natural Stone: Materials like marble, travertine, and limestone offer a classic, earthy aesthetic. While beautiful, they can be a bit harder to cut for beginners. For detailed information, see Natural Stone Mosaics: Marble, Granite, Travertine Guide.
- Adhesives: For most indoor beginner mosaic projects, a good quality cement-based adhesive with a latex additive is recommended. ArtWorker often uses Kerabond T mixed with Isolastic, available in convenient 1 kg and 2.5 kg packages, unlike the large 25 kg bags typically found in hardware stores.
- Grouts: Grout fills the spaces between your tesserae (mosaic pieces), unifying the design. Cement-based grouts are easier for beginners, while epoxy grouts offer superior water resistance for bathrooms and kitchens. A comprehensive guide can be found in Mosaic Adhesive & Grout: Selection & Application Guide.
- Substrates: This is the base onto which you glue your mosaic pieces. MDF boards, plywood, or pre-made ceramic tiles are excellent choices for beginners. They are stable, flat, and easy to work with.
Basic Tools for Beginner Mosaic Projects

Having the right tools simplifies the mosaic-making process and ensures safety. For your first beginner mosaic projects, you won’t need an extensive toolkit, but a few key items are indispensable.
- Nippers (Wheeled Mosaic Cutters): These are your primary tool for shaping tesserae. Wheeled nippers, such as those from Montolit or GoldBlatt, are ideal for cutting glass tiles and smalti with precision. Always wear safety glasses when cutting to protect your eyes from flying shards.
- Safety Glasses: This is non-negotiable. Always wear eye protection when cutting or breaking any mosaic material.
- Spatulas and Trowels: Small spatulas are useful for applying adhesive evenly to your substrate. A rubber grout float will be essential for applying grout effectively. You can find these tools in the ArtWorker shop.
- Tweezers: For precise placement of small tesserae, especially in detailed areas or for micro-mosaic work, a good pair of tweezers is invaluable. Explore options in the ArtWorker tools section.
- Old Cloths/Sponges: Essential for cleaning up excess adhesive and grout.
For a complete overview of what you might need, refer to Mosaic Tools: Essential Kits for Beginners & Pros.
Mosaic artist using wheeled nippers to cut glass tiles” caption=”Wheeled nippers are indispensable for shaping your tesserae with precision.”>
Step-by-Step Guide: Your First Beginner Mosaic Projects (Coaster)
Let’s create a simple mosaic coaster, a perfect example of beginner mosaic projects. This project is small, manageable, and allows you to practice all the fundamental techniques.
Step 1: Choose Your Design and Substrate
For a coaster, a simple geometric pattern or a single motif like a flower or star works best. Keep it straightforward for your first attempt. Choose a pre-cut ceramic tile or an MDF coaster blank as your substrate. Make sure it’s clean and dry.
Step 2: Gather Your Materials and Tools
You’ll need glass tiles in your chosen colors, adhesive (like Kerabond T), grout, nippers, safety glasses, a spatula, and a sponge/cloth.
Step 3: Cut Your Tesserae
Wearing safety glasses, use your nippers to cut your glass tiles into small, manageable pieces (tesserae). Aim for roughly uniform sizes, but don’t worry about perfection — irregularities add character. For a coaster, pieces around 0.5-1 cm are ideal. Remember, safety first! Always cut away from your body and eyes.
Step 4: Apply Adhesive and Lay Tesserae (Direct Method)
Using a small spatula, spread a thin, even layer of adhesive over a small section of your coaster. Begin placing your tesserae onto the adhesive, leaving small, consistent gaps (grout lines) between each piece. You can place them in straight rows (Opus Tessellatum) or follow the contours of your design. Continue this process until your entire coaster is covered. Allow the adhesive to dry completely, typically 24-48 hours, as per the adhesive instructions.
Step 5: Grouting
Once the adhesive is fully cured, it’s time to grout. Mix your grout powder with water according to the manufacturer’s instructions to achieve a consistency similar to peanut butter. Using a rubber grout float or a gloved hand, spread the grout over the entire mosaic surface, pressing it firmly into all the gaps between the tesserae. Ensure all voids are filled.
Step 6: Cleaning
After applying the grout, wait for about 15-30 minutes (check grout instructions) for it to set slightly. Then, using a damp (not wet) sponge, gently wipe away the excess grout from the surface of your tesserae. Rinse your sponge frequently. Be careful not to pull the grout out of the lines. Once the mosaic is clean, let the grout cure for another 24-48 hours. A final buff with a dry cloth will remove any haze. For a more comprehensive guide on DIY mosaic art, check out DIY Mosaic Art: Step-by-Step Guide from Start to Finish.
Key Techniques and Practical Tips for Beginner Mosaic Projects
Mastering a few basic techniques and keeping some practical tips in mind will significantly enhance your experience with beginner mosaic projects.
- Direct Method: This is the simplest and most recommended method for beginners. You adhere tesserae directly onto your substrate. It allows for immediate visual feedback and is forgiving of minor adjustments.
- Tesserae Placement (Andamento vs. Opus Tessellatum): For your initial projects, the Opus Tessellatum technique, where tesserae are laid in horizontal or vertical rows, is the easiest. As you gain confidence, you can explore Andamento, where tesserae follow the contours of your subject, creating movement and flow. Learn more about this in Opus Tessellatum: Classic Roman Mosaic Technique.
- Design Choice: Start with simple designs that have clear lines and few intricate details. Geometric shapes, abstract patterns, or silhouettes are ideal. Don’t be afraid to experiment with color but try to stick to a limited palette for cohesion.
- Grout Lines: Aim for consistent grout lines. They act as the “drawing” in your mosaic, defining shapes and enhancing the overall aesthetic.
- Safety First: Always wear safety glasses when cutting. Work in a well-ventilated area, especially when mixing adhesives and grouts. If working with epoxy grout, wear gloves.
- Troubleshooting Common Mistakes:
- Uneven Tesserae: If some pieces are higher than others, gently press them down into the adhesive before it sets.
- Too Much Grout: Don’t overfill the gaps. Wipe away excess promptly during the cleaning phase.
- Grout Haze: If a haze remains after cleaning, a final wipe with a dry, soft cloth or a specialized grout haze remover will usually do the trick.
Finding Inspiration and Further Learning for Your Mosaic Journey
The world of mosaic art is vast and inspiring. As you complete your first beginner mosaic projects, you’ll naturally seek new ideas and techniques. Explore the works of masters in museums like the Hermitage, the Louvre, or the British Museum, which house incredible examples of ancient and medieval mosaics. Contemporary artists like Emmanuel Duran and Sergey Davydov demonstrate the modern versatility of the medium.
Работы по теме в галерее:
ArtWorker offers numerous resources for continued learning. You can enroll in online mosaic courses to deepen your understanding from the comfort of your home. For those in Moscow, the ArtWorker School of Mosaic provides hands-on master classes every weekend, with all materials included and no prior experience needed. To help visualize your next project, consider using andamento.app, an AI-powered service that transforms photos or text descriptions into mosaic sketches, complete with material calculations. This tool is perfect for planning your next creative endeavor and even offers a guide on How to Create a Photo Mosaic Online: Step-by-Step Guide.
All the materials mentioned in this article are available at artworker.shop — smalti, stained glass, nippers, Kerabond adhesive, and grouts. We offer delivery across Russia, with packaging starting from 150g.